We all want a great atmosphere in our images and in our homes. In this article, I will share some of my tips about how to accomplish just that.
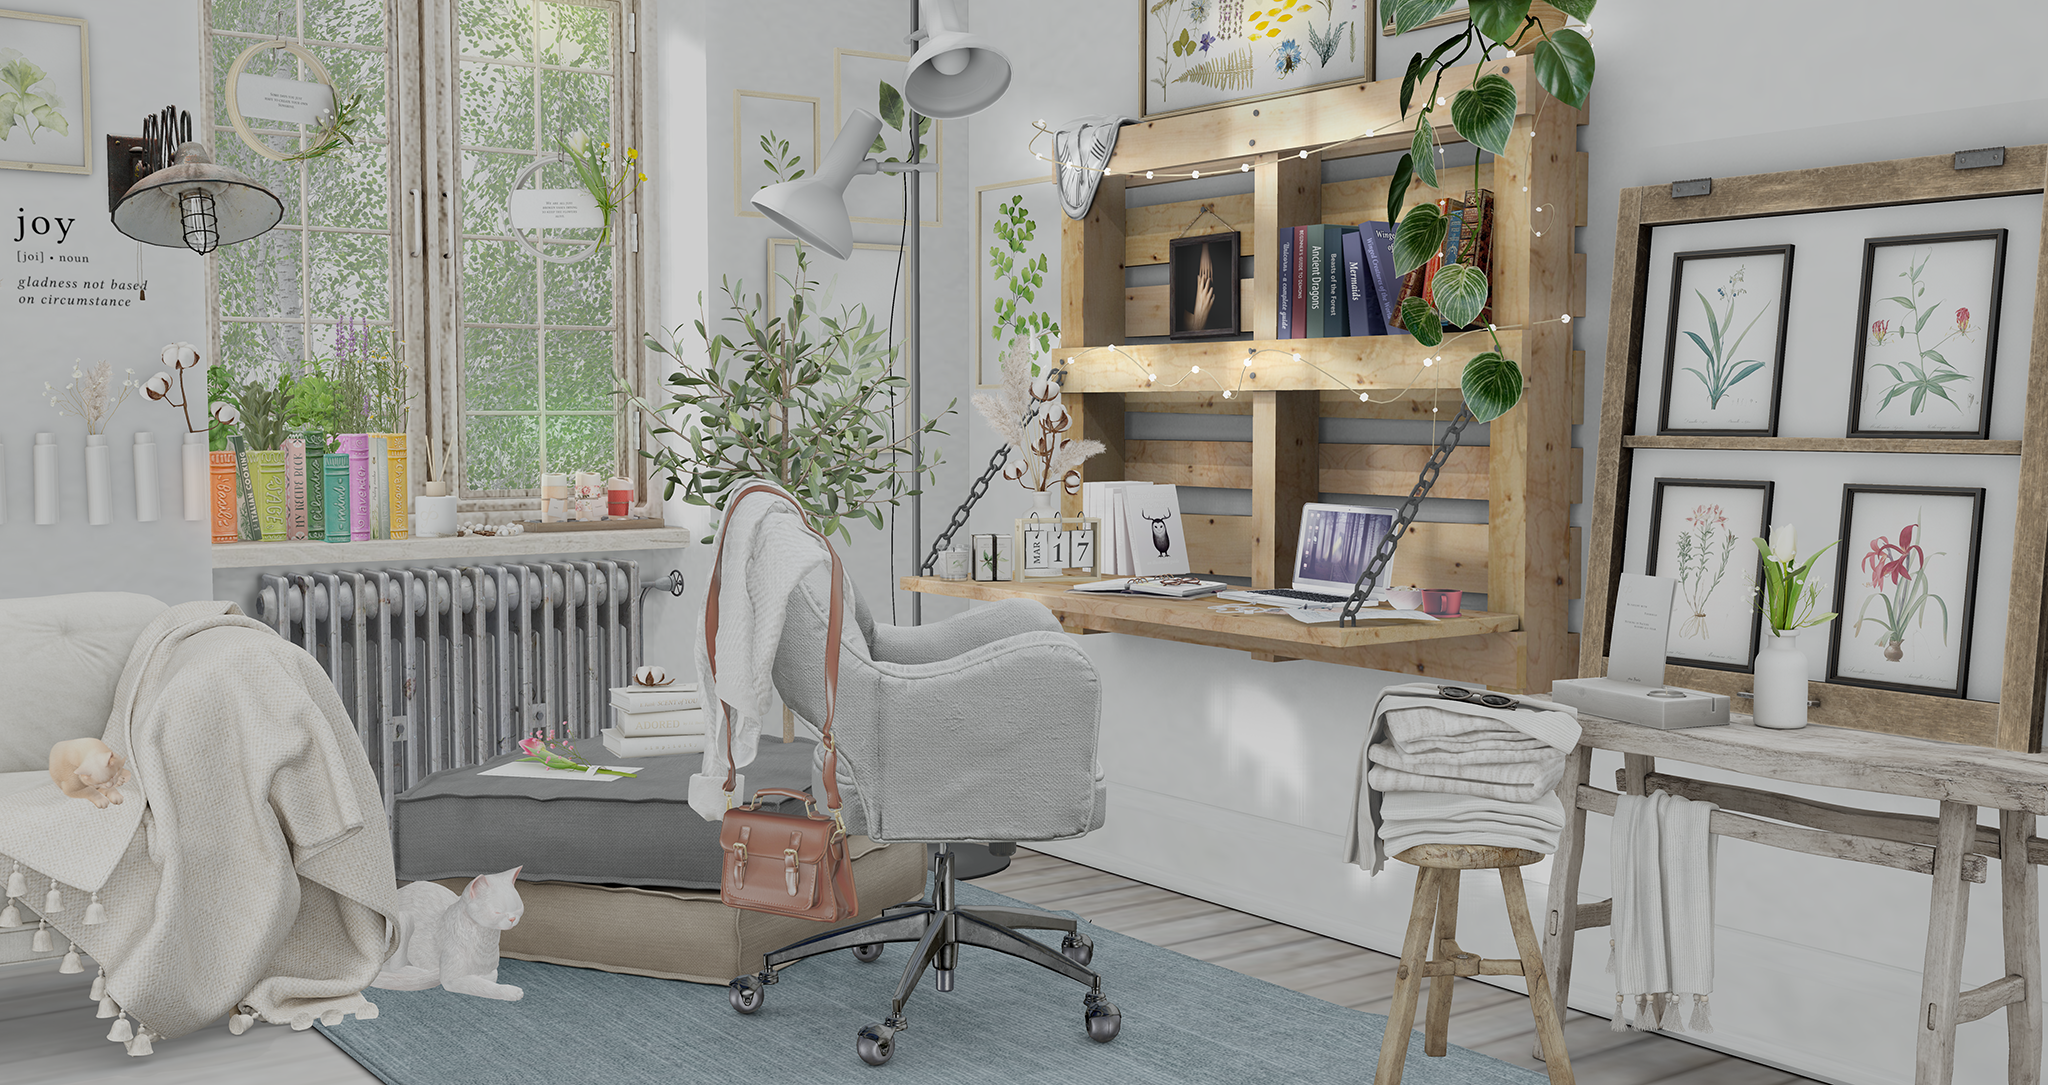
When it comes to a night time atmosphere, sometimes it can prove to be a challenge. In this next few lines I hope to give you some tips and pointers on how to turn day:
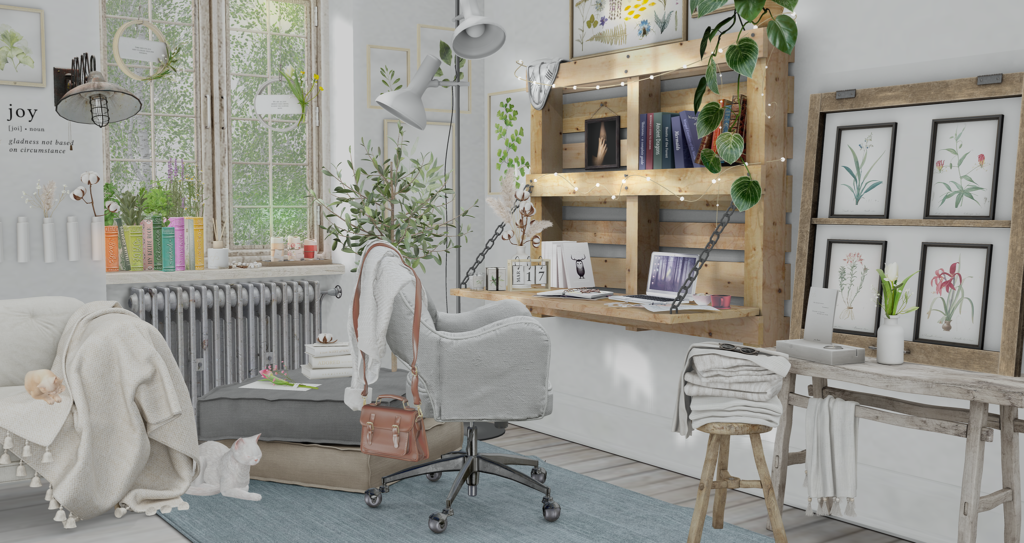
Into night:

I will start with saying the these two images are raw, taken on Black Dragon viewer with no photoshop or any post editing involved.
Much like in Real Life, the same interior design rule applies to Second Life – The use of many different light sources is soothing and brings more calm and flow to a space. In this image there are 7 light sources (roughly from left to right):
1. The Industrial lamp
2. Natural light coming from the window
3. Trio of candles
4. Standing lamp
5. Scented candle
6. Laptop
7. Stringlights
The tips for each are very similar and lean on three things:
– Intensity
– Colour
– Glow
When you rezz a lamp, the default we usually see is a very intense white light. With some simple steps, we can choose how strong we wish the light to appear. One note, it is important that the lamp will be modifiable in order for us to work with it.
With these simple tips every object can become a lamp but for the sake of the example. Let’s start after we have a rezzed a modifiable lamp.
1. Right click the lamp of your choosing and go to edit mode
2. Tick the Select Face box and make sure it is ticked while you’re working on your light.
3. Click the lightbulb of your lamp and on the Build Tools Menu go to the tab that is called Features.
4. At the bottom of your menu you will find the area that is dedicated to light. Click the light tick box
5. The default white light we all know will appear. The first thing is to bring down the Intensity. On the right hand side of the window bring the Intensity to 0.5, Radius to 5 and Falloff to 1.7. You will see the difference right away. Now it is all up to you to play with the settings until you achieve the result you are looking for.
6. Next we attend to the Colour. In this case I gave each light source apart from the Windlight and Laptop a warm yellow/orange shade to make the space more homey. You can change the colour of your light on the right white square you will see on the menu. For the laptop I chose light blue colour for the light.
7. Still on colour we now can switch to the texture tab on our menu
8. Change the colour of the face you chose (In this case the lightbulb) into the colour you chose for your light and place with the colour shade.
9. You can also tick the Full Bright tick box and see if it works to your liking.
10. Whether you use Glow will depend on what results you hope to achieve. While on the same menu, start playing with the Glow till it reaches the level you like.
After taking time to consider these 10 steps, you are likely to have a light that is suitable to your needs.
Here are additional things to keep in mind:
1. You don’t always need to have the same colour for each light. For example, the warm orange on the industrial lamp is nothing light the blueish cool light from the Laptop.
2. You won’t always need to use all the steps mentioned above. For example, for the laptop I didn’t use the full bright option and only played with the glow itself.
3. Each screen, each computer, each viewer are different. So you won’t always get the same effect on your screen that you may see from others. Don’t be discouraged. It happens. And we can never please everyone in one go.
I hope these little tips will help you in creating your own night time places. From candle light dinners to a campfire or just a cozy night at home. There’s no limit to what you can do!
Have fun!